Photo to Recipe App for Android, With a Real Example
See exactly what CookThis returns on Android from one food photo: a beef bulgogi recipe with ingredients, steps, nutrition estimates, and cooking mode.
By Usama Kashif, founder and lead engineer. Read the full CookThis project context for the product decisions behind this work.
CookThis is a photo to recipe app for Android. Take a picture of a finished dish or pick one from your gallery, and it returns an estimated home recipe: ingredients with quantities, numbered steps, tips, a nutrition estimate, and a step-by-step cooking mode with timers.
Rather than describe that in general terms, here is one real result from the app.
A Real Example: Beef Bulgogi From One Photo
I gave CookThis a single photo of a beef bulgogi plate with rice. These screenshots are the actual output, cropped only to remove the phone’s status bar.
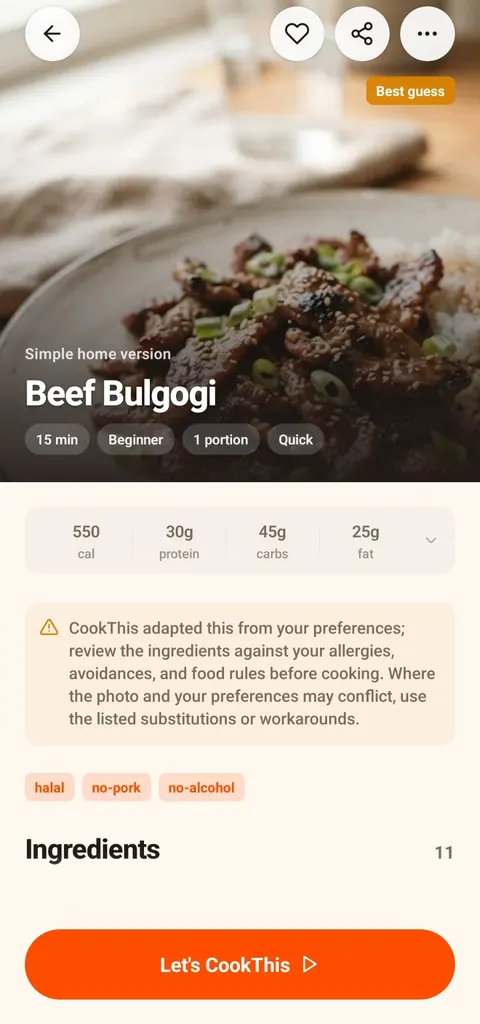
Result: labelled "best guess", with time, level, servings, mode and a nutrition estimate.
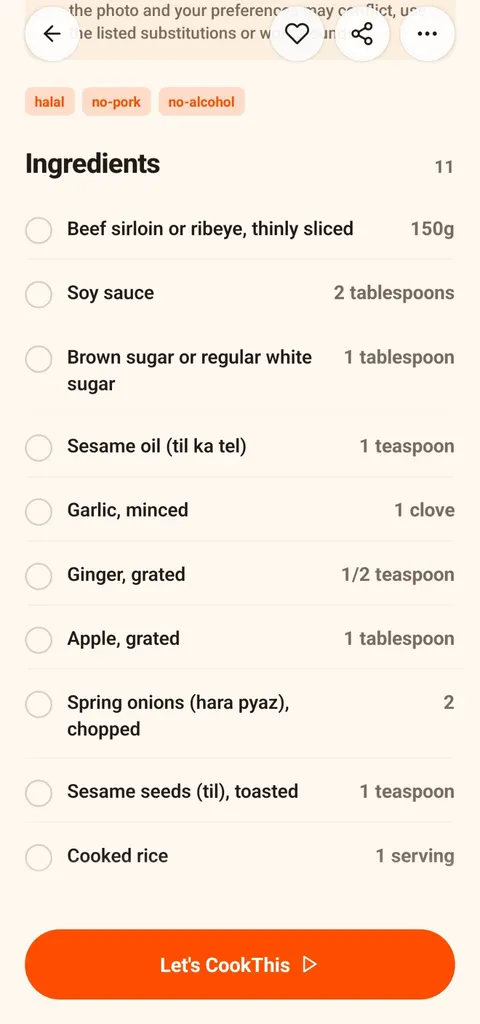
11 ingredients with quantities, adapted to my halal, no-pork and no-alcohol preferences.
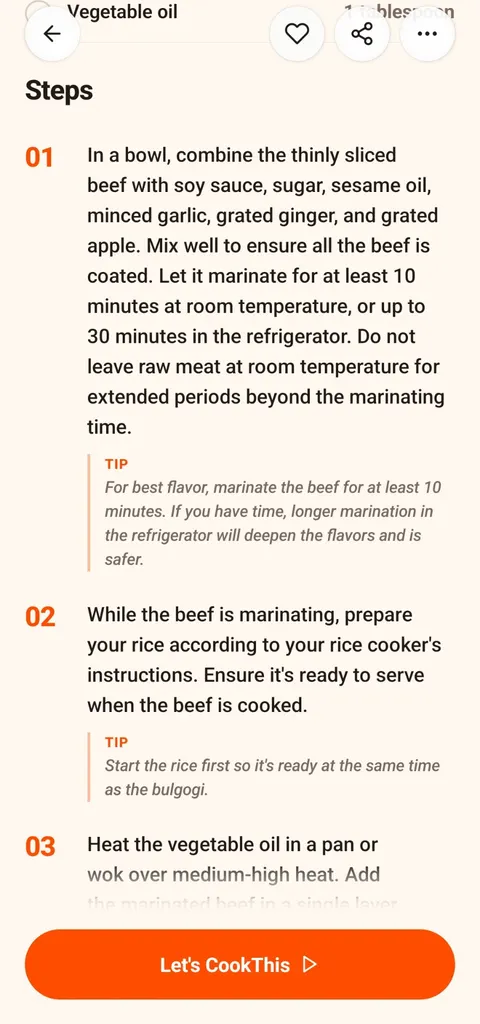
Numbered steps with a tip under each one, including a food-safety note on marinating.
What the result contained:
| Part of the output | What CookThis returned |
|---|---|
| Dish | Beef Bulgogi, marked Best guess |
| Settings | 15 min · Beginner · 1 portion · Quick mode |
| Nutrition estimate | 550 cal · 30g protein · 45g carbs · 25g fat |
| Preference tags | halal · no-pork · no-alcohol |
| Ingredients | 11, including 150g thinly sliced sirloin or ribeye, 2 tbsp soy sauce, 1 tbsp sugar, 1 tsp sesame oil, 1 clove garlic, ½ tsp ginger, 1 tbsp grated apple, 2 spring onions and 1 tsp toasted sesame seeds |
| Steps | Marinate 10 minutes at room temperature or up to 30 minutes in the fridge, cook rice meanwhile, then sear the beef in a single layer over medium-high heat |
Three details are worth pointing out:
- It says “best guess”. The app does not pretend the photo reveals the exact recipe.
- The preferences changed the recipe. Many bulgogi recipes use rice wine or mirin. Neither appears here because the profile is set to no alcohol. You should still check your soy sauce label.
- Ingredient names are localized. Sesame oil appears as til ka tel and spring onions as hara pyaz, because my profile region is Pakistan. The Pakistani ingredients guide covers this in more depth.
Cooking Mode, Step by Step
Tapping “Let’s CookThis” on the same bulgogi recipe opens a focused cooking view: one step per screen, only the ingredients that step needs, and a timer set for that step. Here is the full run, from the first step to the finish screen.
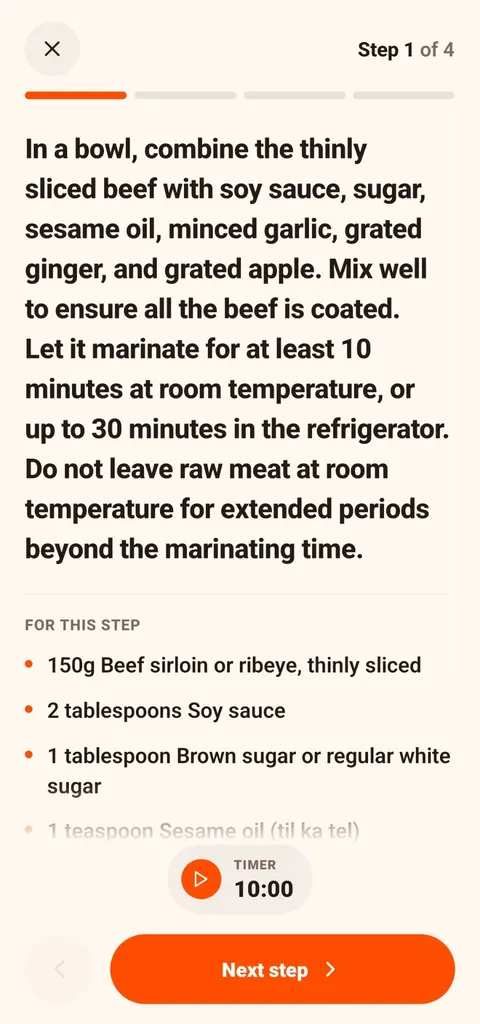
Step 1 of 4: marinate, with a food-safety note. 10:00 timer.
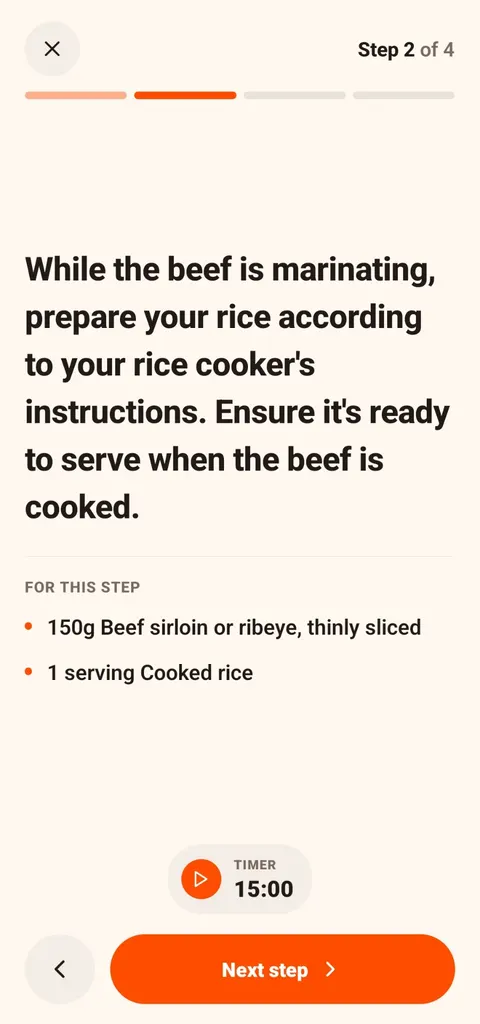
Step 2: rice while the beef marinates. 15:00 timer.
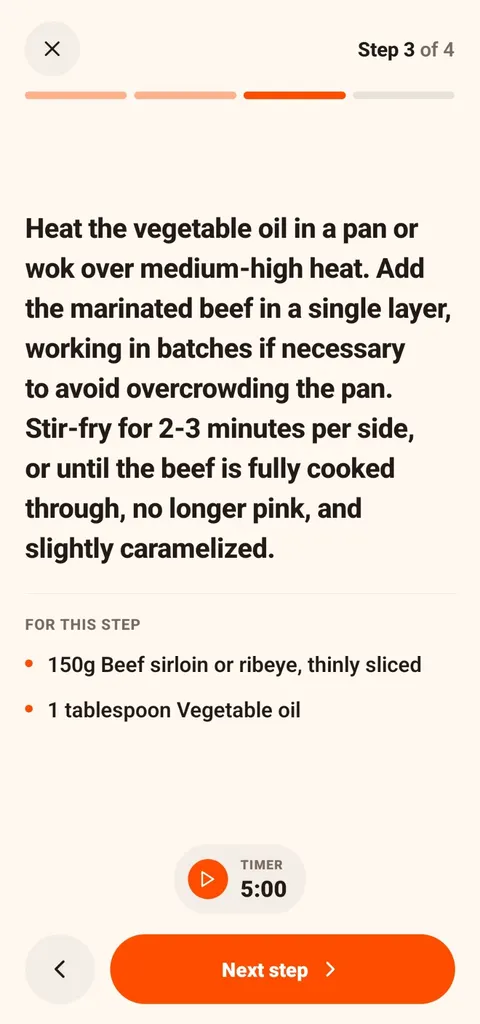
Step 3: sear in a single layer. 5:00 timer.
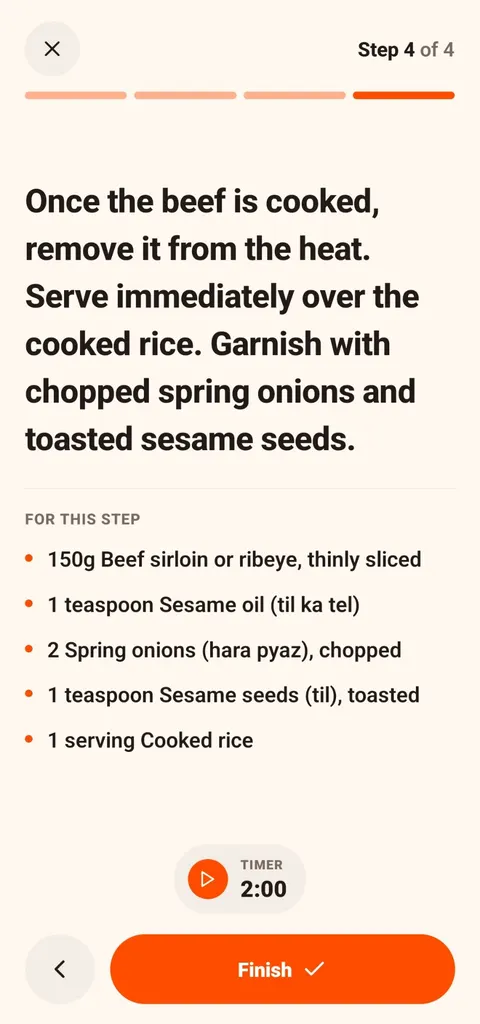
Step 4: serve over rice and garnish. 2:00 timer.
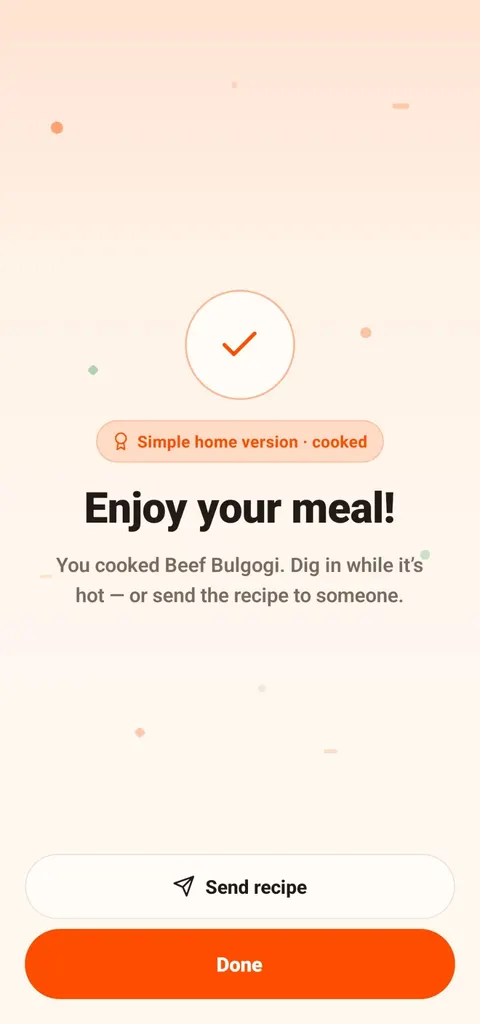
Done: send the recipe or finish.
Two details: step 2 schedules the rice during the marinade, so both finish together, and step 4 keeps the local names (hara pyaz, til) from the ingredient list. For a longer five-step run, see the chicken biryani example, which offers both a pot and a rice-cooker method.
How to Turn a Food Picture Into a Recipe on Android
- Choose the image. Take a clear photo or select one from the gallery, including screenshots.
- Add context if it helps. A menu name, cuisine, or remembered flavor helps tell apart dishes that look alike.
- Set your preferences once. Servings, cooking level, equipment, region and dietary rules shape every result.
- Pick a mode. Quick, Easy, Closest Taste, or Healthier.
- Review, then cook. Check quantities, allergens and food-safety steps, then open cooking mode.
A well-lit photo with the main food clearly visible gives better results than a dark, distant, or cluttered one.
Why I Built It Android-First
CookThis started on Android and is only on Android. Most recipe apps I tried were built for iPhone and ported later. On Android, saved screenshots pile up fast, so the gallery and screenshot flow had to be as quick as the camera.
Is It a Recipe Scanner?
It depends on what you mean by “scanner”. The term covers different products:
| Scanner type | Main purpose |
|---|---|
| Photo to recipe app (CookThis) | Estimates a recipe from a photo of finished food |
| Recipe-card scanner | Reads the text of a cookbook page or handwritten card |
| Calorie or macro scanner | Estimates nutrition for food logging |
| Barcode scanner | Reads packaged-product information |
| Fridge scanner | Identifies ingredients and suggests what to cook |
CookThis does the first job. If you want to digitize printed recipes, use a recipe-card app instead. The CookThis alternatives comparison lists some.
Pricing
CookThis is free to download from Google Play. New users get 3 free credits to try it. After that, continued recipe generation needs a weekly or monthly subscription, managed through Google Play.
Safety and Privacy
Food photos and account data are handled according to the CookThis privacy policy. Dietary preferences guide the recipe but do not certify anything. Check every ingredient and label yourself, verify substitutions, and follow safe cooking temperatures. Nutrition numbers are estimates.
To explore specific situations, see how to recreate a restaurant dish from a photo, identify a dish from a photo, or get a recipe from a TikTok video or screenshot.
Get CookThis on Google Play or view the full project page.
frequently asked questions
Is there a photo to recipe app for Android?
Is CookThis free?
Can I use a saved food screenshot instead of taking a new photo?
Is CookThis a recipe scanner for printed recipe cards?
Does CookThis recover the exact recipe from a photo?
related CookThis guides
How to Choose the Best Recipe App for Android
There is no single best recipe app for Android. Match the app type to how you cook: recipe library, recipe manager, pantry finder, or photo to recipe.
What Is a Photo-to-Recipe App?
A photo-to-recipe app turns a picture of food into a home-cookable recipe. Here is how it works, how it differs from Google Lens and chatbots, and where it falls short.
How I Built CookThis: An AI Recipe Generator From a Food Photo
A founder's account of building CookThis: how the photo-to-recipe pipeline works, why results are labelled as estimates, and the stack behind the Android app.
CookThis: See it. Snap it. Cook your version.
CookThis turns restaurant photos, screenshots, and ingredients into practical home recipes on Android. Free to download with 3 free credits to try it.

